1. Introduction
In experimental chemistry lessons, historical wet lab detection reactions are particularly popular, above all, Fehling’s test from 1848 (see Fig. 1) and the slightly better Benedict test from 1909 [1,2]. In modern analytical laboratories, these methods have become largely obsolete due to more specific and faster technologies. However, modern detection methods (e.g., gas chromatography and high-performance liquid chromatography or HPLC) are almost exclusively “black box” methods, where the route from sample to result—crucial to the learning process of students —remains completely elusive. In addition, exorbitant upfront costs for many modern detection machinery (e.g., electrospray ionization mass spectrometer (ESI-MS), approx. USD 250,000), render their application in secondary education classrooms virtually impossible.
Due to their didactical merits and monetary advantages over “black box” analytical technology, current chemistry teaching materials still rely on classic test reactions for carbohydrates. However, due to their historical context, these methods frequently use chemicals that should be avoided, substituted, or abandoned altogether from a modern lab safety perspective [3]. Outdated compounds in contemporary lab activities with students include 1-naphthol when performing Molisch’s test, ammonia in the classroom (Woehlk test), and copper ions (Fehling, Benedict) or silver fulminates in the lab waste following the use of Tollens’ reagent.
Here, we examine the most frequently applied carbohydrate tests in secondary education chemistry labs and present safer alternatives and procedures. In this part, we will look at historical carbohydrate detection reactions and a novel method for wet lab lactose detection. The next part will deal with improved detection reactions for carbohydrates.
 |
|
Figure 1. Hermann von Fehling. Photo: Public Domain. |
2. Fehling’s, Benedict’s, and Barfoed’s Test—Three Heavy Metal Classics
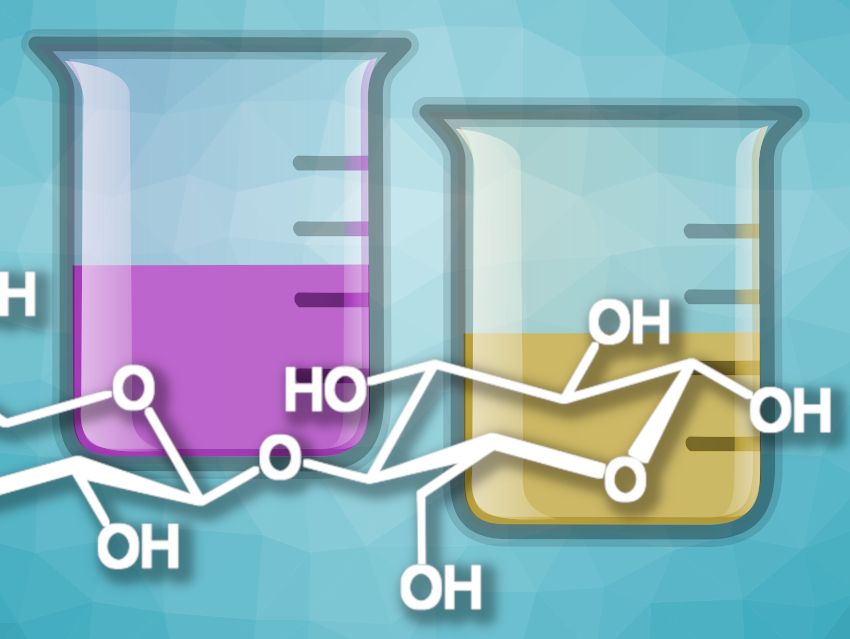
Fehling’s, Benedict’s, and Barfoed’s tests are all based upon the reduction of copper(II) ions paralleled by an oxidation of the aldehyde group of reducing sugars.
Challenges: From a modern lab safety perspective, it seems disadvantageous that all three processes produce copper-containing waste, which must be disposed of separately as heavy metals.
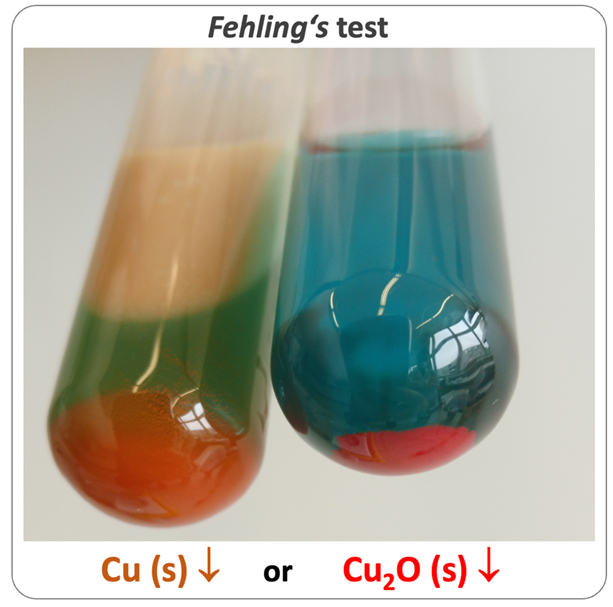
The idea of analyzing the precipitate gravimetrically has to be dismissed as the reaction produces both red copper(I) oxide and orange elemental copper, which can hardly be distinguished accurately (see Fig. 2).
 |
|
Figure 2. Similarly colored but chemically distinct Fehling’s test products: elementary copper (orange, left) and copper(I)-oxide (brick-red, right). Photo: H. Rautenstrauch. |
It has been demonstrated that if copper(II) ions are available in excess, additional discolorations and color changes may occur (see Fig. 3), which are semi-quantitative indicators of reducing sugar concentrations [4]:
- Slightly green discoloration: less than 0.1 % (w/w)
- haze with yellow-green discoloration: 0.2–0.3 % (w/w)
- yellow-orange precipitate: about 0.5 % (w/w)
- brick-red precipitate: greater than or equal to 1 % (w/w).
These data [3] refer to the use of a glucose solution, therefore, percentages must be doubled when testing for disaccharides.
It is often taught that glucaric acid is formed during glucose oxidation. However, this is incorrect as, in fact, glucosone is formed [5]. Only n-aldehydes are oxidized to form the corresponding carboxylic acids.
In many school labs, it is customary to heat Fehling sample test tubes over a Bunsen burner. Since strongly alkaline solutions frequently show a delay in boiling (“bumping”), direct heating by flame should be avoided to prevent injuries.
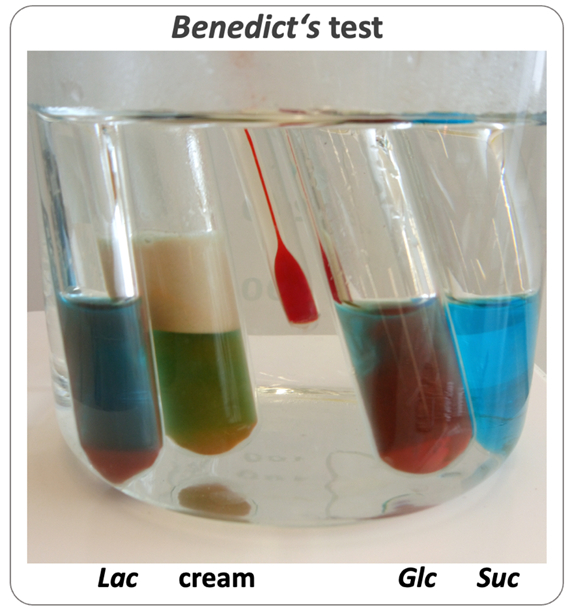
Recommendations: To address the latter, we recommend using a water bath with a temperature of 65 °C, which offers the additional benefit of parallel observation of several test tubes (see Fig. 3). Moreover, additional tests described below provide alternative, heavy-metal-free detection methods.
 |
|
Figure 3. Benedict’s tests with sugar solutions and dairy products. Photo: H. Rautenstrauch. |
3. Woehlk’s and Fearon’s Tests—Heavy-Metal Free (with ifs and buts)
Two historical tests with great bearing on school chemistry have been wrongfully overlooked in the past and have only recently gained more attention [6]: the Woehlk test from 1904 and Fearon’s test from 1942 [7]. With these tests, lactose concentrations of milk products can be demonstrated and visualized in wet lab activities (see Fig. 4).
.jpg) |
|
Figure 4. Woehlk’s test applied to various sugar solutions (from left to right: lactose, maltose, cellobiose, lactulose, sucrose, glucose, fructose, galactose, galactose/glucose mixture; 50 mg per tube); details in text. Photo: K. Ruppersberg. |
Here, lactose and other disaccharides with a 1,4-glycosidic linkage react with ammonia (Woehlk’s test) or methylamine (Fearon’s test) at pH 13 in a water bath (T = 65 °C) to form a red dye (see Fig. 4, left). Reducing monosaccharides (glucose, galactose, fructose, etc.) form a yellow dye in these tests, while solutions of non-reducing sugars (e.g., sucrose) remain colorless (see Fig. 4, middle and right).
Challenges: From a safety perspective, ammonia usage should be avoided in chemistry classrooms. Moreover, methylammonium chloride is not a standard chemical in school labs. Thus, the applicability of both Woehlk and Fearon’s test in contemporary chemistry classes may rightfully be questioned.
Recommendations: A recent discovery ameliorates these caveats. The red dye of Fearons’s test is formed not only with methylamine, but also with various other amines [8]. While some of these are unsuitable for usage in school labs (e.g., n-propylamine or cadaverine, due to their toxicity or foul smell, respectively), hexamethylenediamine is very safe to be used by students and already in stock in most schools due to its common use in nylon synthesis experiments. While Woehlk’s and Fearon’s test already provide heavy-metal-free alternatives to Fehling’s, Benedict’s and Barfoed’s tests—with the added benefit of a clear distinction between reducing mono- and disaccharides (see Fig. 4)—use of hexamethylenediamine as an alternative amine eliminates the need to use hazardous or scarcely available chemicals altogether.
In addition, the water-bath method of heating test tubes can be further improved by using 100 ml beakers instead of test tubes and microwave ovens with (i) inverter technology and (ii) a rotating plate (see Fig. 5a and b) instead of conventional microwave ovens or heating plates. Inverter technology ovens radiate energy continuously and evenly, thus, minimizing the risk of delays in boiling (“bumping”) [9]. Heating procedures for microwave ovens need to be optimized by instructors upfront for use in the classroom, i.e., by determining optimal power levels and heating times.
 |
|
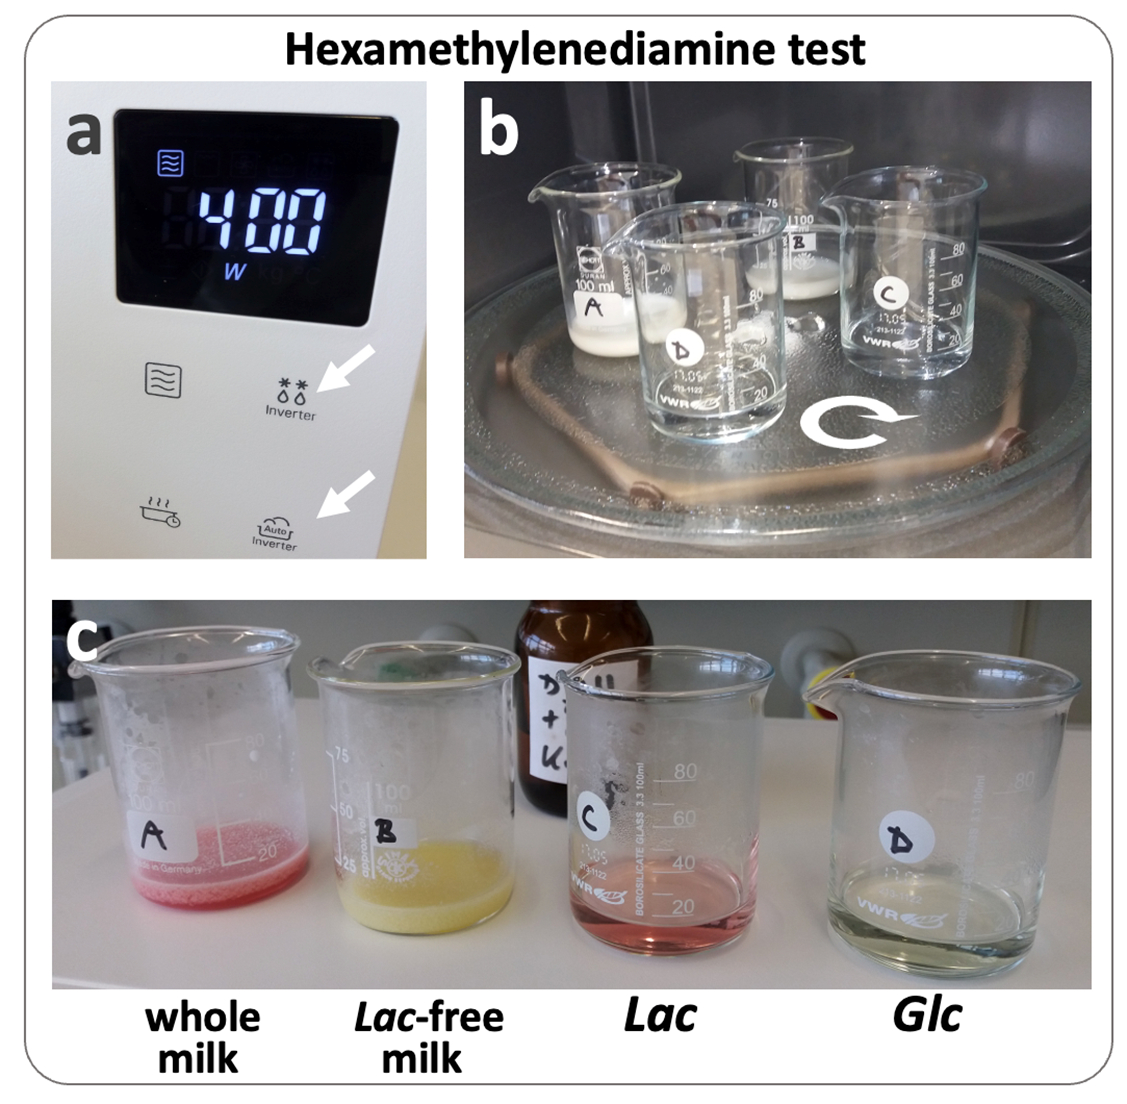
Figure 5. Hexamethylenediamine test with dairy products and sugar solutions; a) Microwave oven with inverter technology (note the “inverter” icon on the oven’s metal case; see arrows); b) test samples A–D on rotating plate; c) hexamethylenediamine test results with dairy products and sugar solutions: red dye formation with whole milk (A) and lactose solution (C), yellow dye formation for lactose-free milk (B) and glucose solution (D). Photo: K. Ruppersberg. |
3.1. Testing Dairy Products and Sugar Solutions with the Novel Hexamethylenediamine Method
Protocol: Add 5 mL ready-to-use hexamethylenediamine solution (see below) to 5 mL of dairy product or sugar solution (ω = 5 % to 0.1 %) into a 100 ml beaker (or crystallising dish). Heat for 60 s in an inverter microwave oven set to 400 W (see Fig. 5a and b). Carefully remove hot beakers from the oven using crucible tongs or gloves and observe the result (see Fig. 5c).
3.2. Preparation of a Hexamethylenediamine Ready-to-Use Solution for Lab Activities
Recommendations for hexamethylenediamine handling (summarized in Fig. 6): Partially melt the solid and often clumped together hexamethylenediamine (m.p. = 41 °C) in its storage bottle under a fume cupboard using a water bath (60 °C) for approx. 30 min (see Fig. 6a and b). Use a plastic syringe or disposable pipette to draw up the liquified substance and swiftly add 1.46 g (l) to a tared 500 mL brown glass bottle (see Fig. 6c). Add 500 mL of sodium hydroxide solution (c = 0.1 mol/L), close the bottle, and mix.
The solution may be kept for up to half a year; decay will be indicated by flocculation. The label must indicate the pictogram GHS05 (metal corrosive), H290, the signal word “caution”, and the date of preparation.
 |
|
Figure 6. Hexamethylenediamine handling: a) storage bottle with solid, often clumped together hexamethylenediamine; b) partial liquefication in water bath; c) tared brown glass bottle on lab balance; details in text. Photos: K. Ruppersberg. |
References
[1] S. R. Benedict, A Reagent for the Detection of Reducing Sugars, J. Biol. Chem. 1909, 5, 485–487. https://doi.org/10.1016/S0021-9258(18)91645-5
[2] H. Rautenstrauch et al., Chemiedidaktik: Welcher Zucker ist in der Probe, Nachr. Chem. 2002, 70, 15–20. https://doi.org/10.1002/nadc.20224116610
[3] K. Ruppersberg, So viele Chemikalien in der Sammlung, Nachr. Chem. 2020, 68, 16–20, https://doi.org/10.1002/nadc.20204095908
[4] H. Aebi, Einführung in die praktische Biochemie für Studierende der Medizin, Veterinärmedizin, Pharmazie und Biologie, Karger, 1965.
[5] H. Fleischer, Fehlinterpretation der Fehling-Probe auf reduzierende Zucker – Von der Beobachtung im Chemieunterricht zur Evidenz gegen die Oxidation der Aldehydgruppe, CHEMKON 2017, 24, 27–30. https://doi.org/10.1002/ckon.201610283
[6] K. Ruppersberg, K. et al., How to visualize the different lactose content of dairy products by Fearon’s test and Woehlk test in classroom experiments and a new approach to the mechanisms and formulae of the mysterious red dyes, Chem. Teach. Int. 2019, 2, 20190008, https://doi.org/10.1515/cti-2019-0008
[7] W. R. Fearon, The detection of lactose and maltose by means of methylamine, Analyst 1942, 67, 130–132. https://doi.org/10.1039/AN9426700130
[8] K. Ruppersberg, Nachweis von Lactose (und Maltose) im Kontext Schule: Wöhlk-Probe, Fearon-Test und 1,6-Diaminohexan-Verfahren im kontextorientierten experimentellen Chemieunterricht: Aminbasierte Farbreaktionen als Kohlenhydratnachweise, Ph.D. thesis, University of Flensburg, Germany. 2021. https://doi.org/10.13140/RG.2.2.17310.46400
[9] K. Ruppersberg, H. Klemeyer, Quick-test: How to detect lactose in 60 seconds?, CHEMKON 2020, 27, 199–202. https://doi.org/10.1002/ckon.201900064
Know Thy Carbs! Safer Carbohydrate Detection Methods for School Labs – Part 2
Improved detection reactions for carbohydrates
Also of Interest
- 150 Years Alfred Wöhlk,
Klaus Ruppersberg, Janet Blankenburg,
ChemistryViews 2018.
https://doi.org/10.1002/chemv.201800002
Despite many efforts, the mechanism of this still-used detection reaction from 1904 is still unknown
![]()